Orpheus WebMail
The WebMail system is a web-based front-end to your Orpheus mailbox. Connecting to WebMail allows you to read and send email messages whilst you're away from home or using someone else's computer.The WebMail system is located at http://webmail.orpheusnet.co.uk and should be compatible with any browser. However, you require cookies enabled in order to login successfully.
WebMail now works with the current version of NetSurf on RISC OS.
In order to connect to WebMail you require your user ID in the form of two or three letters and two numbers (eg. ab15) and your POP3 email password. Enter them in the relevant boxes and click the 'Login' button.
The first time you use the WebMail system, you should familiarise yourself with its user interface and user preferences. Some of the preferences are required in order for the system to work correctly.
Most importantly, you need to set your own email address so that people can reply to your emails successfully.
Setting your email address
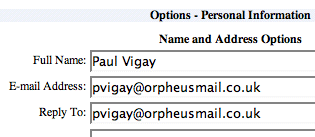
Click on Options at the top of the screen.
Click on Personal Information in the selection of available options.

Now enter the email address you want people to see your messages coming from in the E-mail Address box. Remember to click Submit at the bottom of the screen, to save your settings.
N.B. You may want to change some of the other preferences too.

Displaying the size of your messages
WebMail has a number of columns in the display, such as From, Date and Subject displays. You can actually customise these to your own preferences. One very useful column is the Size, which will tell you how large each email is. By default this option is off.
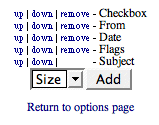
To turn it on, go to the Options at the top of the screen and click on Index Order (which allows you to change the order as well as enable/disable the various columns).

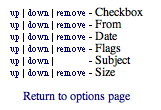
The various columns available are listed and any disabled columns are available to select in the drop-down menu at the bottom. Select the column you would like to add; Size and click Add

The settings are saved automatically, so you can click on Return to options page to continue setting the options, or just return to your INBOX.
|
Additional Support Computer Systems Game Consoles |