These instructions are written assuming you are using Windows XP and Outlook Express. If you are using a different version of Windows, please contact us for further information.
Step 1
Load Outlook Express and you should see the toolbar along the top of the window. Click on the Tools option and a drop-down menu will appear. Near the bottom of the menu there should be an Accounts option. Click on this option. (fig.1)
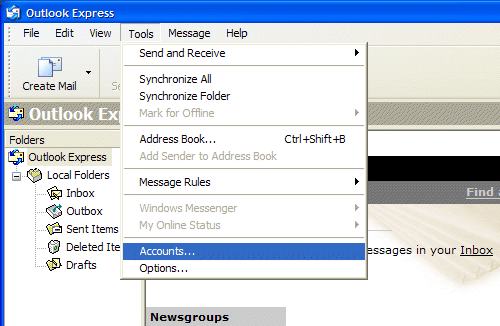
Fig.1 - Loading OE and creating a new Account
Step 2
Adding a new account
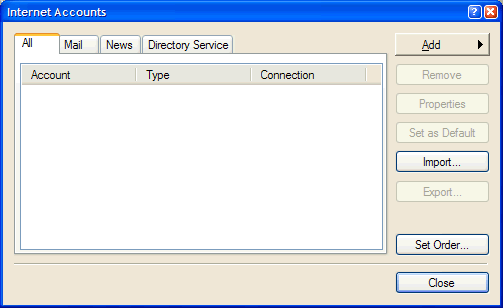
Fig.2 - Internet Accounts
N.B. If the computer is a brand new one, or Outlook Express has never been used before, you may see some previous (Microsoft advertisers) accounts listed in this window. If so, simply select each one and Remove it. These are demo accounts by Microsoft sponsors in the US and only serve to clutter up your mail accounts.
You should see the window shown above (fig.2). If so, click the Add button at the top of the right-hand panel. Select Mail... to add a new email account.
Step 3
Setting your Name
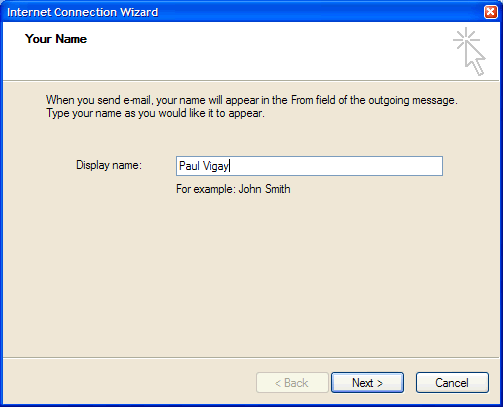
Fig.3 - Setting your Name
Enter your name as you would like it to appear on your email addresses. This can be anything you want. It does not need to be your email address or your account ID. It's simply your 'human name' that will be used to put on your outgoing emails. If you want to remain anonymous, you could simply enter 'Barney Bear' or something, otherwise simply enter your real name.
Click Next when you're ready.
Step 4
Setting your Email Address

Fig.4 - Setting your Email Address
Now enter your email address. This should be your Orpheus email address which you were assigned when you subscribed, and should be on your initial paperwork. If you've not been given an email address you can request one by visiting www.orpheusinternet.co.uk/register/email.html
Click Next to continue.
Step 5
Setting the Server details
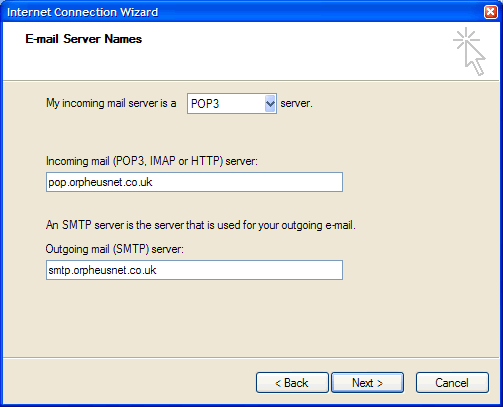
Fig.5 - Setting the Server details
You should now enter the Orpheus mail server details exactly as provided on the sheet of paper with your initial account details on them. For reference, the incoming mail server is a POP3 server and is called pop.orpheusnet.co.uk
The outgoing (SMTP) server is called smtp.orpheusnet.co.uk
Make sure you enter both names correctly, watching the spelling, and then click on Next.
Step 6
Entering Account details
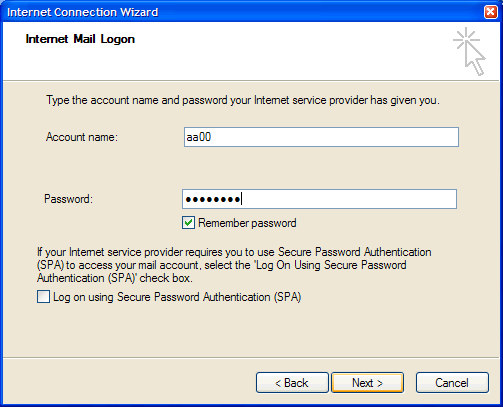
Fig.6 - Setting your mail account details
This step is where most people sometimes make a mistake, and is where you should enter your Orpheus POP 3 mailbox account settings. These were supplied on the piece of paper with your initial account details on it. The account name is your user ID or POP3 account ID. It's usually in the form of two or three letters followed by two or three numbers.
Enter your password exactly as shown on your account paperwork, noting that both the user ID AND the password are case-sensitive - so make sure of the status of your caps lock key.
Tick the Remember password box and also ensure that the SPA (Secure Password Authentication) option is turned OFF (unticked).
Double-check these settings, as if the username and/or password is incorrect the server won't allow you to login to download your emails. If all has been entered correctly, click Next to continue.
Step 7
Finishing...

Fig.7 - Finishing...
Your mail account has now been setup and should be ready to use. You can now click Finish in order to complete the setup procedure.
Step 8
Complete!
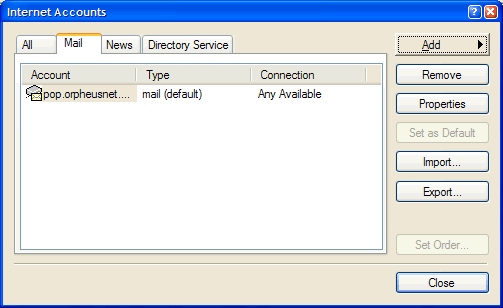
Fig.8 - Complete!
You will now be returned to the original Internet Accounts window that you originally opened in step 1, but this time it will show your Orpheus mail account in the list of accounts. You can now Close the window and continue to use Outlook Express to send and receive your Orpheus emails.
N.B. Should you wish to edit your account at a later date, you can simply highlight the pop.orpheusnet.co.uk account and then click on Properties. We have some separate instructions for editing internet accounts.
If you want to configure anything else on your PC, return to the main Windows support page.
|
Additional Support Computer Systems Game Consoles |
|
|